Your donation will support the student journalists of Grand Center Arts Academy. Your contribution will allow us to purchase equipment and cover our annual website hosting costs.
A Photographer’s guide to St. Louis
November 3, 2017
As a student reporter, I often take photos to accompany my stories. It is perhaps my favorite part of being on staff because my photography goes further than my photojournalism. This site is not nearly the extent of my photography, as I am an aspiring animal and nature photographer. I have had an interest in photography ever since I received my first camera as a first grader. I have a fascination for using the camera lens to capture my surroundings and to create art. Although I am not a professional, I’ve had a lot of experience taking photos in my hometown of St. Louis and I would like to share my favorite locations with you, as well as some tips as to how to take good photos.
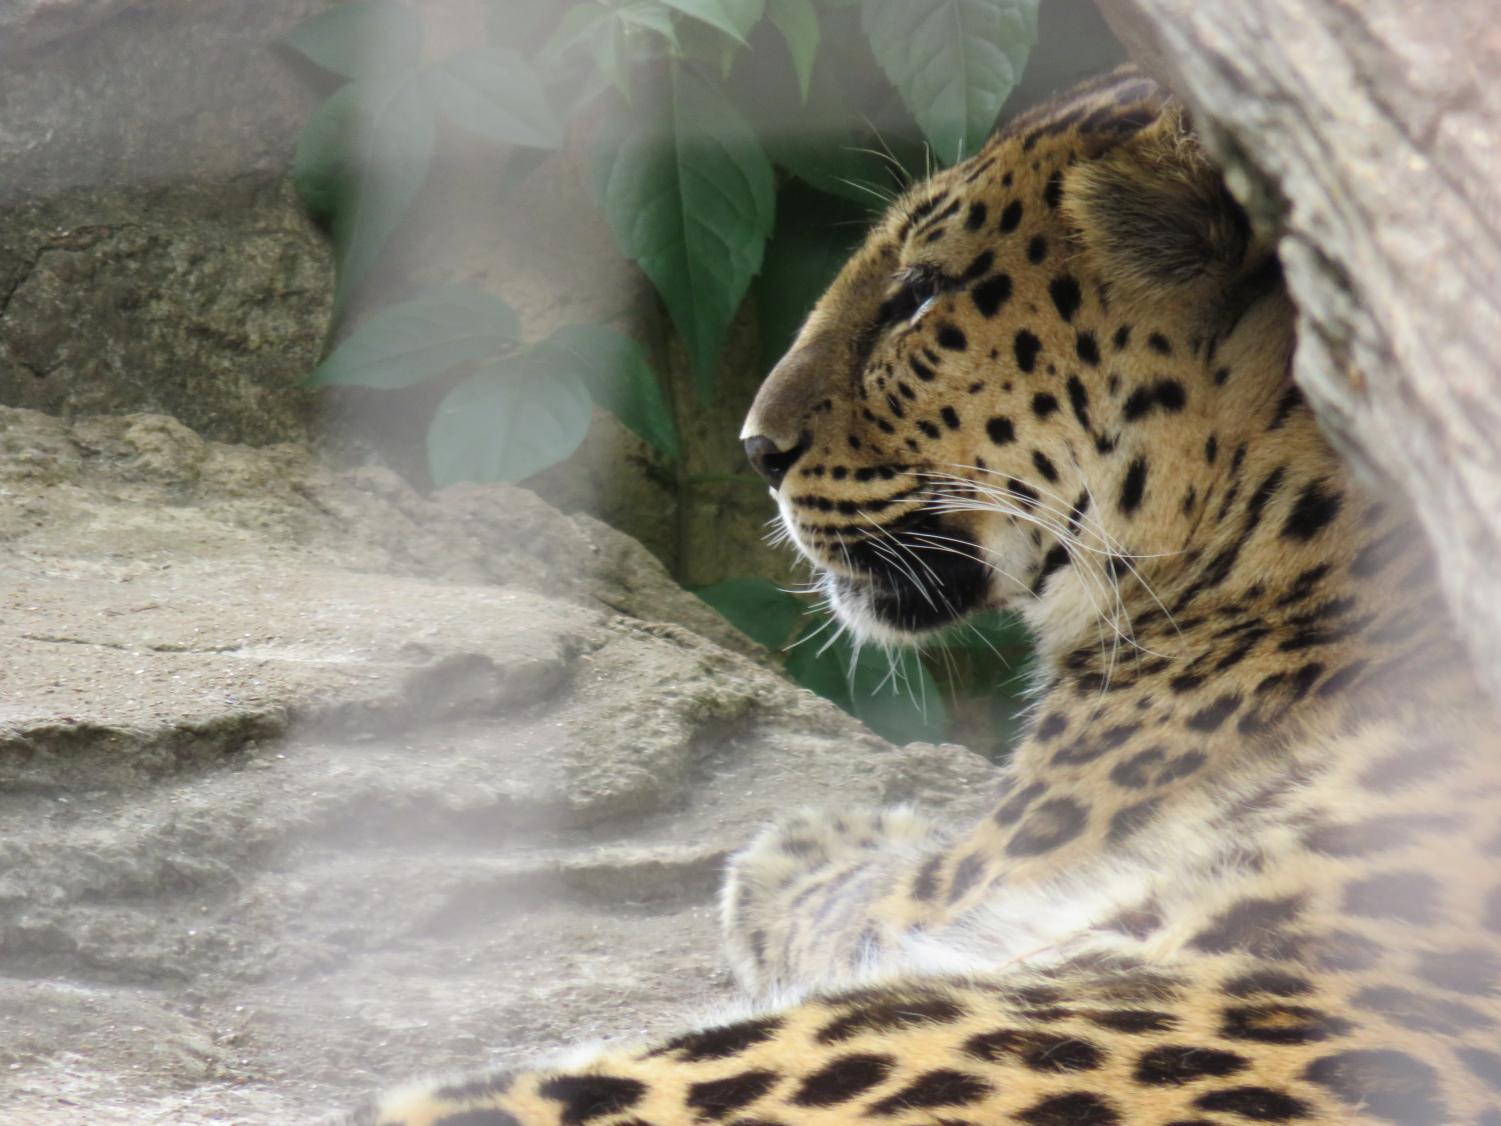
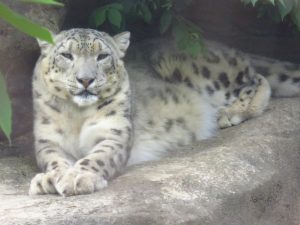
A leopard in Big Cat Country. Notice the way I’ve used the mesh to frame it and carefully situated the camera so that none of the bars crossed the head.
St. Louis Zoo encompasses photogenic scenery throughout various habitats, exhibits
For someone who specializes in animal photography, this is an obvious choice. Not only is it regarded as one of the nation’s best zoos, it is also free, making it a prime spot for photography. It is very large, meaning there’s a lot of opportunities.
The zoo is divided into six sections. “River’s Edge”, as the name suggests, emulates the habitat of riversides and displays animals from such places. “Discovery Corner” is near the Zoo’s main entrance and includes the Monsanto insectarium and a large children’s zoo. “Lakeside Crossing” includes a lake full of waterfowl such as pelicans, ducks, and geese, as well as a relatively new sea lion exhibit. “The Wild” has the a partially indoors penguin exhibit, red panda and prairie dog enclosures, a huge great ape section and a flamingo pond. “Historic Hill” has three buildings, one for small primates, one for reptiles and amphibians (which also displays several large reptile species outdoors nearby the building), and one for birds with a decent sized bird garden nearby. “Red Rocks” displays hooved animals, ostriches, and kangaroos, and also has a section dedicated to felines.
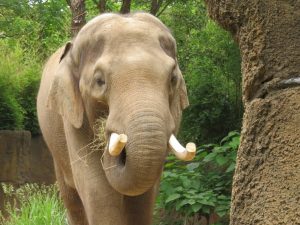
“River’s Edge” mostly has several very large enclosures, and you follow a trail to walk by all of them. Most of the enclosures are ideal for photography, as they do not have fencing or glass. Some new enclosures for two bear species and African wild dog has glass, so if you’re heart-set on photographing them you should make sure you bring a polarizer filter if you have access to one. I personally do not have any additional camera equipment, so I’d recommend that people in such situations put the lens against the glass for minimal glare, although this prevents you from photographing the animals up close.
There is a large, two part hippopotamus exhibit that, in my opinion, is one of the most interesting parts of the zoo. The main part is a glass tank where visitors can watch the hippos swim, and there’s a part where this action can be watched from the top of the water. The latter is much easier, but the glass part makes for more interesting photos.
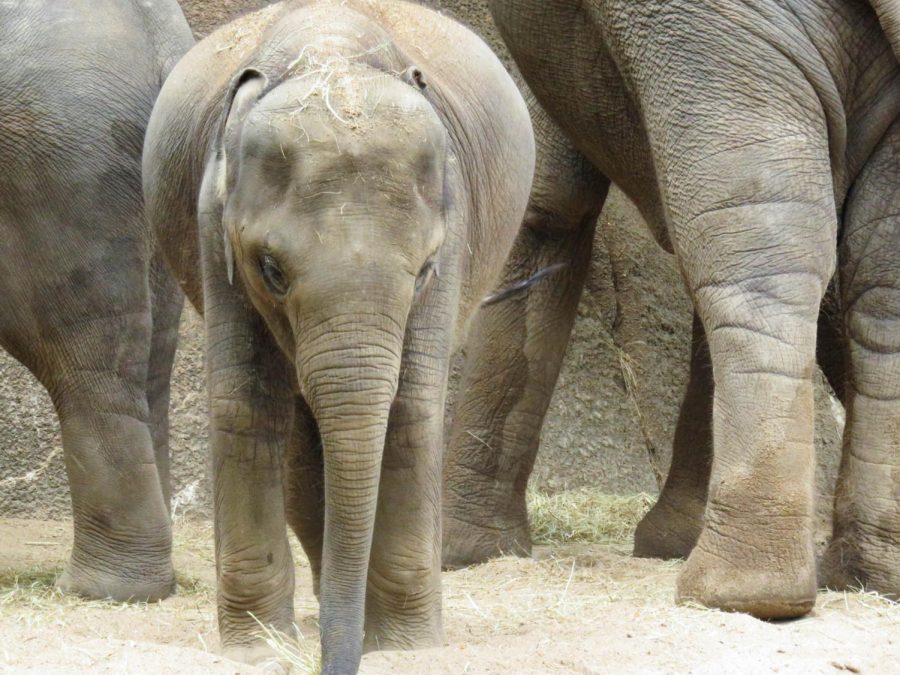
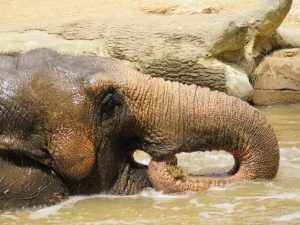
The largest enclosure perhaps in the entire zoo is the massive elephant exhibit. Different parts display different individuals–elephant social dynamics make it unsafe to keep full grown males around the calves. It is easy to photograph in because there’s no metal fencing or glass, so I highly recommend this.
Another great part of River’s Edge is that there’s actually plenty of non-animal photo opportunities, as it is full of plant life and there’s a waterfall at the beginning of the trail. For shooting waterfalls, I recommend using a tripod and putting your camera on a low shutter speed–this is how the flowing water effect that you see in many waterfall photos is achieved. If you go in the winter, you may also have an opportunity to photograph it when it is frozen.
There is also a cheetah exhibit in River’s Edge, but the cheetahs are typically in the back. In fact, I don’t recall seeing them in plain view since I was in Elementary school. If you’re going to that part of the zoo just for the cheetahs, I would advise you not to waste your time on it.
“Discovery Corner” has two areas in which there are animals to be photographed. The insectarium has two parts, the main part and a butterfly dome. It is so dark inside the main part that if you don’t have proper equipment for photographing in low light, it’s useless to try and photograph there. I would skip it and head straight to the butterfly dome. Additionally, without manual focus it will be very hard to achieve the desired results with your photo. The only aspect that wouldn’t be against you is that the bugs are typically stationary, so you don’t have the struggle of trying to photograph moving subjects in dark lighting.
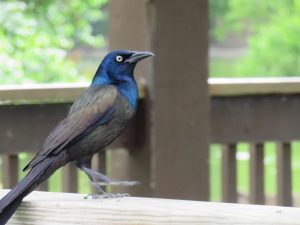
You can also photograph the naturally occurring animals. Areas where people are eating are ideal for this.
The butterfly dome is worth your time if you’re a photographer. Although I don’t have any extra lenses yet, if you have a macro lens this would be a great opportunity to use it. Even without the macro lens, it is worth your time and will help you get some nice photos. I’d recommend you use manual focus on the butterflies, but even if you can’t you still have a pretty good chance of getting something you like.There are even more flowers here than there are at River’s Edge. On the way out of the dome there’s an outdoor part aimed at attracting native butterflies. Although you don’t get the exotic animal factor one would look for at a zoo, it still makes for a good photo opportunity. After all, who doesn’t love butterflies on flowers?
The other part of Discovery Corner, the Children’s Zoo, actually has some good photo opportunities, and if you are able to I actually would recommend coming in to take some photos. It does cost extra, but if you get there before 10 AM it’s free. That way, not only will you not have to pay, it will spare you the awkwardness of ordering a ticket to the children’s zoo. The animals on the display I find to be noteworthy are fennec foxes and meerkats, which are kept indoors, so keep that in mind when you go to photograph them. There’s also a river otter, kept behind glass outside. The otter moves very fast, but through the same routine repeatedly, so although it may be challenging, by dedicating effort and time you have a chance of getting something. I recommend trying for shots of it running into the water.
Apart from the sea lion exhibit, “Lakeside Crossing” would be easily dismissed because it doesn’t feature any other exotic or rarely seen animals, but if you have extra time I would recommend trying to photograph some of the birds on the lake.
The sea lion exhibit is superb in terms of viewing. The part where you get an above water view is a pretty safe bet for photographing them when they peak out from the water and sleep on rocks. For the swimming ones, it is a good idea to learn their routines so you can have your camera pointed there in advance, which increases your chance of getting the shot you want. With the tunnel, it would be difficult to get a good photo that is simply an underwater sea lion photo given the fact the shape of the glass is curved and that it is often very crowded, making reflections pretty much unavoidable. However, with some creativity, you can use the fact that it is a tunnel filled with visitors to your advantage. I also recommend coming in the winter or early spring, because the sea lions tend to interact with visitors a lot more.
The red panda and prairie dog exhibits are fantastic for photography, because the animals are fairly close to zoo-goers and there is no glass or fencing to deal with. The Red Panda is often hiding in its enclosure and you aren’t guaranteed a good view, but with prairie dogs there is pretty much always a photo opportunity, given that there are so many of them. Also, they often interact with naturally occurring squirrels and birds, so that could allow for some interesting photos.
The flamingo pond makes for good photos, and lends itself to some environmental group shots.
The new polar bear exhibit is great for typical visitors, but as a photographer it has its challenges and I have yet to get a photo in it that I really like, although I haven’t been able to spend much time trying. The large great ape exhibit includes an ape house and outdoor enclosures. Glass is an issue for most of it, but apes can make for interesting subjects and you can photograph their often human-like behavior.
The indoor section of the penguin exhibit is infamous for being very cold. It is also quite smelly, so if you are especially sensitive to smell it would not be for you. It’s also pretty dark, so photographing without special equipment is a challenge. My suggestion would be to stick to the outdoor part.
I haven’t had a chance to see the new Grizzly exhibit, but from what I’ve seen it looks amazing, with a naturalistic design that emulates the habitat of real grizzly bears, perfect for photography. It does seem to have glass, which would be a bit of an impairment, but it seems to me like the potential result would be worth the struggle.
Some parts of “Historic Hill” are also worth a photographer’s time. In the primate house, given that the animals there are so energetic and it’s so dark, unless you have equipment made for such things, put your camera on burst setting. However, if you don’t have much time, or much space on your memory card, I’d just move on to other parts of the zoo.
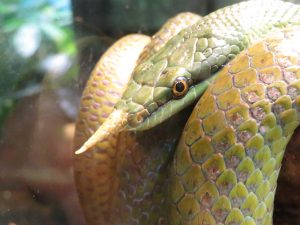
The Herpetarium, which displays reptiles and amphibians, can offer some excellent photo opportunities. Although not many people are fans of these creatures, they offer interesting textures, patterns and colors and are often stationary, making it easier and quicker to get a good shot, and also to experiment with camera placement and techniques. There are several downsides, however. The first is that it is pretty dark, and even with a point and shoot you can find some spots that are well-lit enough. I would strongly suggest using manual focus here, because in my experience point and shoot cameras have trouble distinguishing the subjects.
I’ve not gotten around to the Bird House and garden in a very long time, so I wouldn’t be able to give good advice based on lack of recent experience.
The world’s fair flight cage is a great part of the zoo for photography that I highly recommend. In fact, I regret not spending more time there. Although the inhabitants may not interest you as much as tigers and elephants, it is a really good opportunity to take animal photos without the angle limitations of typical enclosures, and capture animals in convincing environments. I am personally going to start prioritizing this part of the zoo.
“Red Rocks” displays predominantly large mammals, and several bird species. The large mammal selection consists mostly of hooved animals, but kangaroos and some cat species as well.
The Antelope House is exactly what the name implies: a stable where animals are kept, often for the season. Although I can understand why you’d go in to see your favorite animal that is off-exhibit for the season, it is most certainly not worth it for photography. It is extremely dark, the stables are barred and the spaces the animals are in are uninteresting.
Big Cat Country is a decent sized feline section of the zoo. The enclosures for the lion, tiger and jaguar are large and viewed from far overhead. The angle can be a bit odd in photos, but you can make it work. The real difficulty is the enclosures for smaller species (cougar, serval, leopard). They are pretty well decorated, but they are fenced with mesh, a zoo photographer’s worst enemy. Fortunately, the wires are thin enough to blur out to be non-distracting, as long as they don’t cross any of the animal’s main features.
The rest of “Red Rocks” is paths lined with enclosures. They are good for photography because they don’t have wire fencing or glass that would typically be an impairment.
In conclusion, the spots you’ll want to hit are River’s Edge, the prairie dogs, World Fair Flight Cage and “Red Rocks”. Now, it’s time for you to take advantage of this free gold mine of photography opportunity.
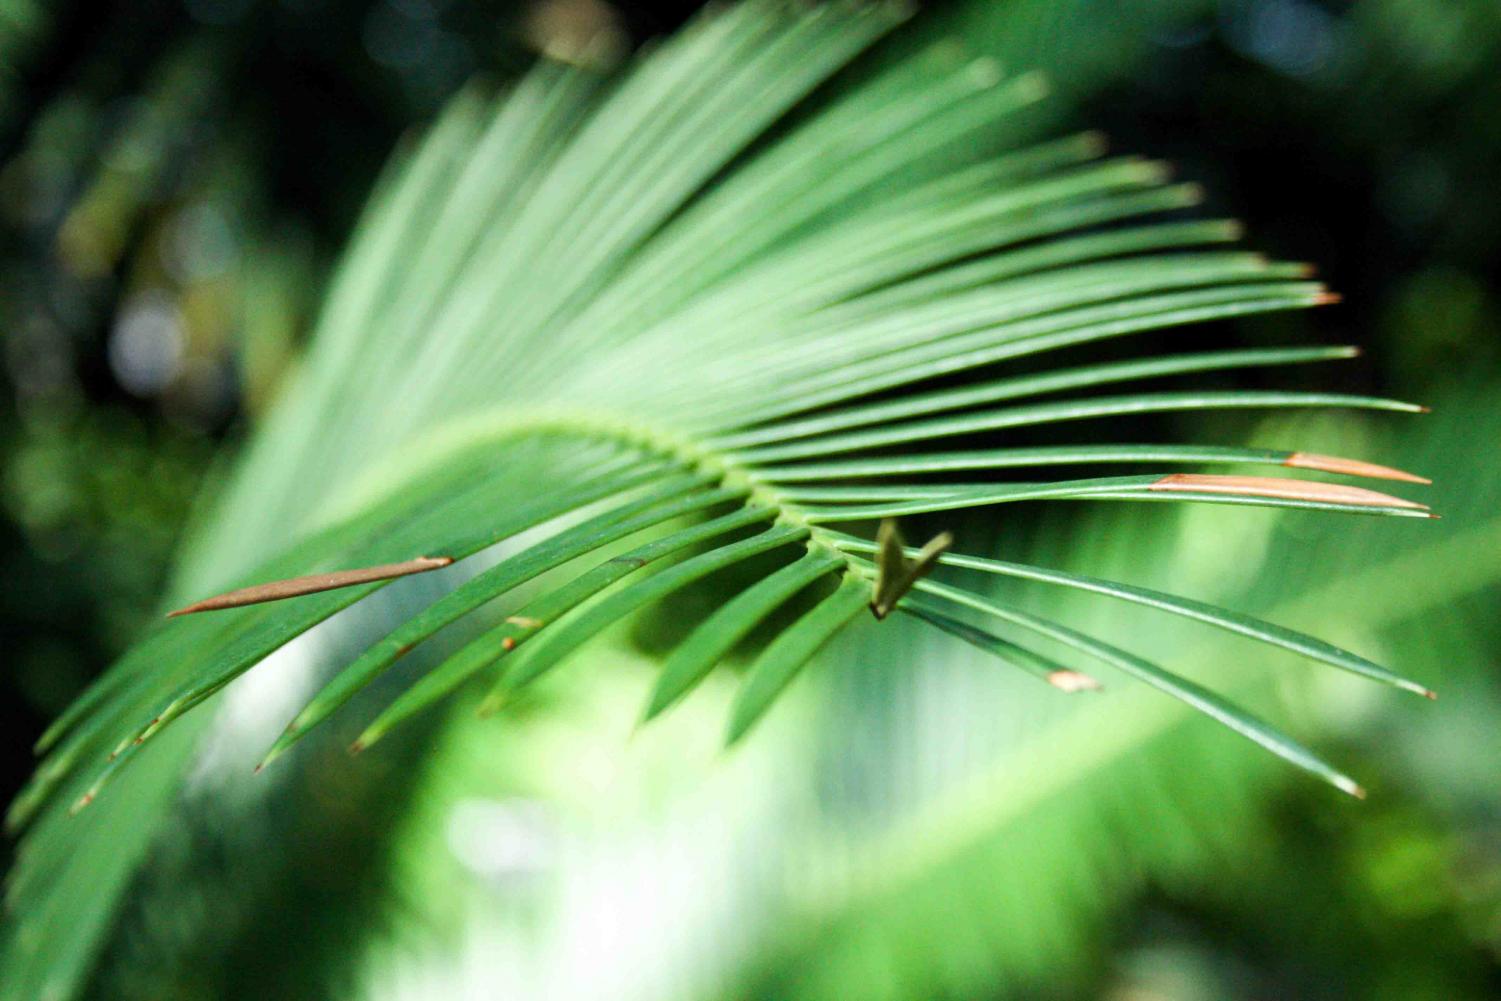
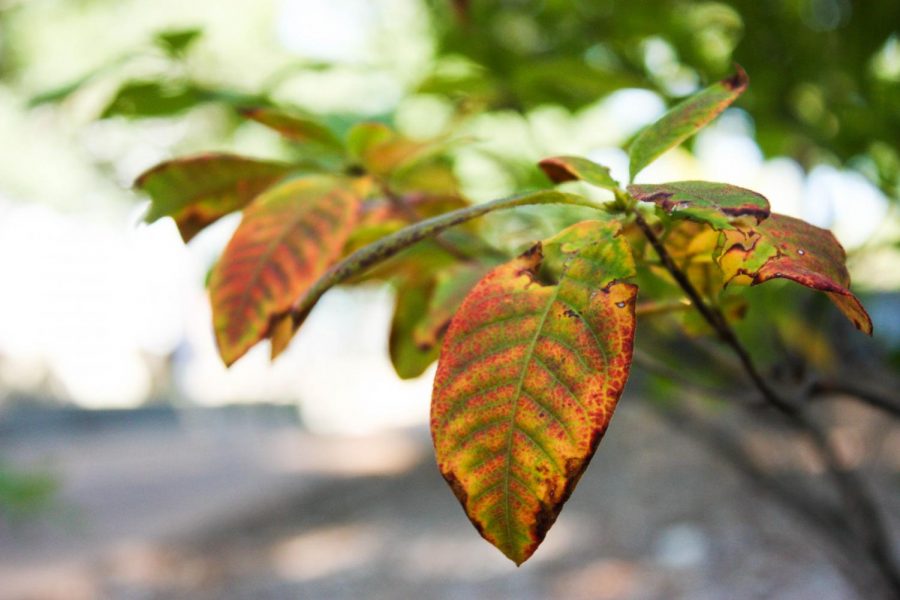
A leaf in the Climatron. This is an example of how you can use plants for an artistic composition given that they are stationary. If it could move, I would have never been able to go something like this.
Missouri Botanical Garden features well-composed environments, opportunity
Although I do consider animals my preferred subjects, plants are a fairly close second. The good thing about them is that you can move around them and play a lot with angles and perspectives, as they won’t move and you have a lot more freedom to move around then with an animal. This makes them great for stylistic experimentation, and allows you to really consider your composition as you photograph it, as they will not be going away anytime soon. They often display very interesting patterns, colors and textures and given their vast variety of possible colors, a lot of potential for well-contrasted photos. A great place to find such subjects is the Missouri Botanical Garden, a 79 acre park full of a variety of plants.
Additionally, it goes without saying that plants change with the seasons, so depending on the time of year you will have different things to expect. At pretty much any point in time, there will be something in a visually interesting stage of its cycle. In the indoor exhibits, things are much more consistent, but they still can vary, not to mention plants are often replaced. This way, you never run out of photos to take.
The one drawback is that admission isn’t free. If you plan on being a frequent visitor, you may benefit from purchasing a membership, which will give free admission for at least one person, along with other awards that vary depending on the level. If you’re interested in that, you can find details on their website.
For if you live nearby and don’t want to pay, there are plenty of plants on its outside, and the neighborhood it is set in offers some photography opportunities, and it’s right next to the free Tower Grove Park, which’s photo opportunities are a review of their own.
As for the actual parks, there are a lot of things to go over, as it contains a lot of different exhibits. It starts with the visitor center, which does sometimes have special exhibits in it. You then walk out into the park in front of a large fountain that operates seasonally. From that point, you have two ways you could go- right, towards the well-known Climatron, or left, towards the rose garden. The path is essentially a loop, so it doesn’t matter which way you start, but I prefer to go straight to the Climatron.
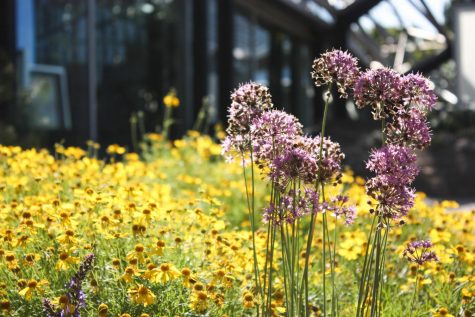
A photo taken in the wildflower garden. Notice the complementary dominant colors and how the sunlight adds to the feel of the photo.
If you choose to go towards the Climatron like I do, you follow a path that will eventually lead you there. As you would expect, it is bordered with flower beds that are worthy of photography. These plants tend to vary seasonally. Then, you arrive to the Temperate House, which is attached to the Climatron. On the outside of it, there’s a large wildflower garden, and it is absolutely beautiful. In my opinion, it offers opportunities even better than the Climatron, as it offers natural light. One day I went when it was sunny, and I was quite happy with the way that sunlight affected my results. I think it helps with the feeling of the photos. Definitely don’t skip this part.
Once you get to the Climatron, in front of the door there are some ponds filled with various lily pad species, some of them very large and impressive. There are also some colorful, abstract glass sculptures made by glass sculptor Dale Chihuly leftover from 2007 when they displayed a surplus of his work in a park-wide exhibit. Several other Chihuly sculptures are scattered throughout the park, including one in the Visitor Center. I think they are gorgeous and can make for awesome photos with the way that they reflect on the water they float in. Keep in mind that they are brought inside for the winter to keep them from breaking. Definitely pay attention to the reflections in these ponds and think about how you can use them in your photo.
The actual Climatron is a large dome with a rainforest habitat, displaying an ecosystem of jungle-dwelling plants of all sizes, and even a few animals. It is complete with waterfalls and small pools. It is extremely impressive and offers a great deal of photo opportunities. I will warn you that the light is pretty low in some spots, so I’d recommend using a low-aperture lens. Tripods and monopods are prohibited in buildings, so getting stability will be difficult. Fortunately though, there’s nothing too intense, and even if you can’t take photos in the darker spots there will be areas where you will to make up for it.
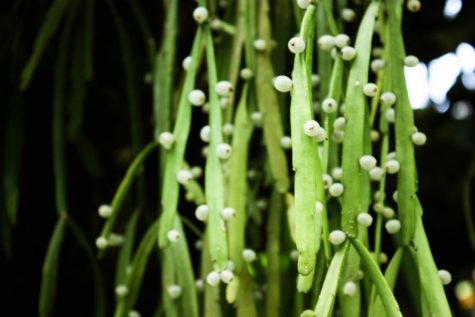
A hanging plant in the Climatron. Notice how the circular shapes scattered on the plant and how they add appeal to the photo. Things like that are one of the reasons why plants are such great subjects.
At the end of the Climatron, there are some geckos. Given that they are small, and are situated a couple feet away from the path, you will need a decent zoom to photograph one. Additionally, mice are attracted to that spot, likely because of the gecko food, and and you can take advantage of that too, although it is pretty difficult to photograph the mice because this area is pretty dark and the mice are quick to react to movement. The geckos tend to be pretty stationary, so you have a much better chance with them.
When you leave the Climatron, you enter a children’s play exhibit. When you are here, you have two options. You could go straight outside or to the aforementioned Temperate House. It is similar to the Climatron, but it is less ecosystem based. The aspect is still there, but much less so, as it does seem like things are more organized into sections. It features from a mediterranean climate (which are characterized by their mild winters). Some of the plant collections are important economic plants of mediterranean areas, like figs, grapes, figs and more, an area dedicated to plants from the bible, Madagascar plants, and a bog of carnivorous plants. The architecture is also prominent and is very much a part of the exhibit. For example, there is an fountain area made of colorful porcelain tiles. There’s also a small stream at the entrance with fish. It’s not quite as grand as the Climatron, but it definitely has its own charm and features some visually interesting plants, making it worth a visit.
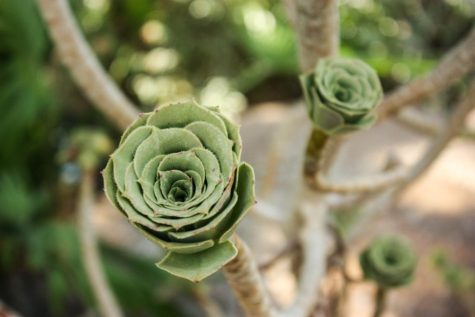
This succulent plant in the temperate house is one of the interesting and unusual plants held in this area.
Considering you’re still on the same path, you’ll be led past the large Children’s Garden to the lake in the back. On the way there there will be a path to the one of the two rose gardens and the chinese garden. The path to the former runs through various garden arrangements. The exhibit itself is exactly what it says. It’s an area made up of rows of more than 150 rose varieties and not much else. This can be an advantage if you only want roses in the background rather than one that could be distracting. It is definitely worth the walk and the time when roses are in bloom.
The Chinese Garden is a small but well worthwhile section. It features charming oriental architecture, a mosaic path and a small pond. Many of the plants it features originate from China. This section is more about the overall design than the individual plants, but they all come together to create something serene and beautiful. Because of this, you should focus more on taking environmental scenery shots rather than close ups.
Past this, you’ll pass various gardens that you can explore further with offshoot paths. They supply plenty of opportunity. Close to where the path turns with the lake, there’s a maze of paths lined the boxwoods shrubs, the area’s namesake, enclosing flowers that contrast their green colors. As visually interesting as it is, I haven’t had much success with photography here. That has something to do with the fact that far-out shots aren’t exactly my strong point. If you are good with that kind of thing, this is probably something you’d like to try, but if not, a close-up photo will fail to capture the beauty of the exhibit.
If you take the previously mentioned turn around the lake, there’s an area called the Carver Garden. It celebrates the life of George Washington Carver, a botanist born in Missouri enslaved who would go on despite that to be a great influence in agriculture. To be honest, I haven’t spent much time with photography here. For whatever reason, I’m never able to focus much on photography when I’m there- be it a dead camera battery, full memory card or me being there with a friend with little patience for stopping at every garden for 15 minutes to photograph the plants there. Therefore, the advice I can give you is pretty limited. What I do know is that it is a nice tribute to such an important figure in the field of Botany. One recommendation I can give you is in regards to a fountain ring that frames a life-sized bronze sculpture of Carter. I gave this tip for waterfalls in my review for the zoo, but using the support of a tripod (it’s okay because it isn’t in a building) you can set your camera to shutter speed priority and set it to a long duration. This will give the water a flowing effect. Definitely experiment your shutter speed settings to find what works best. This technique is called long exposure. It could also be applied to the waterfalls in the Climatron, but you will have to find other means of support than a tripod.
Back on the main path, you’ll pass a stream that comes off the lake. It adds to the picturesque nature of that particular spot and is certainly something to keep in mind, as there are many different ways you could use it to compose a great photo.
The entire lake area is beautiful and full of infinite opportunity. On this side, the lake is bordered with smooth, dark gray rocks. Definitely watch for reflections on the water of the trees and shrubs and think of how they could be incorporated into your photo to make it stronger. There’s also a bridge to an island that is only open during their annual Japanese festival. Throughout the year though, you can walk on half of the bridge, which you can use to get more perspectives. The bridge also can add a lot to the photos that its in.
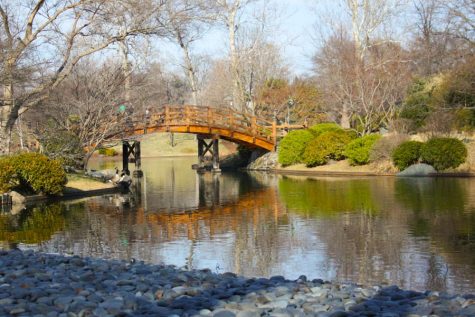
The lake in late winter. Notice how I payed close attention to the reflections in the water when I took the photo.
There’s a koi feeding bridge where visitors can purchase handfuls of fish food pellets for huge amounts of large, colorful koi fish. Because they come out from the surface to catch the food, there’s a photo opportunity here. They often form entertaining “expressions” in their attempts to catch to food and display interesting patterns and colors. It may take a while to get something outstanding, but the opportunity is certainly there.
You are now on the left side of of the park. As you continue walking, you’ll walk past the Japanese Garden , which, similar to the Chinese Garden, has a very calming, serene quality that can be used to create photos of that nature. It displays many forms of traditional Japanese art, most prominently a zen garden along the path. It’s not nearly as colorful as the other areas, but this in no way diminishes the photo value. It actually gives a chance to focus more on tones.
As soon as the path leads you turn away from the lake, you’ll be in the English Woodland Garden, which based on its setup is a good opportunity that can resemble a real woodland. This will give the photos a naturalistic quality. It features dogwoods, azaleas and rhododendrons. Spring is a great time to come because these things will be in bloom.
Close to the woodland garden, there’s also a German Garden that displays native German plants or that are somehow connected to the country in other ways. The setup is similar to the previously described area, it’s a woodland setting consisting of herbs, trees and shrubs. It is meant to look unarranged, contributing to a naturalistic feel. Although it may not stand out quite as well as other parts, it certainly is not to be overlooked by photographers, as it presents many opportunities similar to the English Woodland Garden.
Past that, there’s a section that included the Tower Grove House, a maze, and a tower. Although I am sure it offers a lot of opportunity, this is a section I’ve often found myself skipping to save time, as it veers off the main path.
If you continue down this path, you’ll get to a daylily garden. For some reason, there’s something about these flowers that I find difficult to photograph. That doesn’t make it not worth the effort, as they have interesting shapes and their insides in particular have interesting details with their stamen. They have several different colors, so depending on where you take the photo you’ll be able to show color contrast too.
Not far from there, there’s a similar iris garden. Irises make for interesting subjects because they often have different contrasting colors in a single flower.
If you keep traveling up from there, you’ll arrive the second of the two rose gardens, which is similar in setup. In the same area, there are four pools with statues that can create interesting reflections, definitely something you’ll want to pay attention to.
At this point you’ll be very close to the visitor center, but there’ s still one more thing worth checking out. That is a building close the entrance called the Linnean House, a display greenhouse including sub-tropical plants. Given that it is a house, the backgrounds will not match the subjects well a lot of the time, so I recommend using a low aperture and using the focus to obscure the background, as it will simply be distracting and not add anything to the image’s tone otherwise. This is a tip applicable in many parts of the garden, but now more than ever.
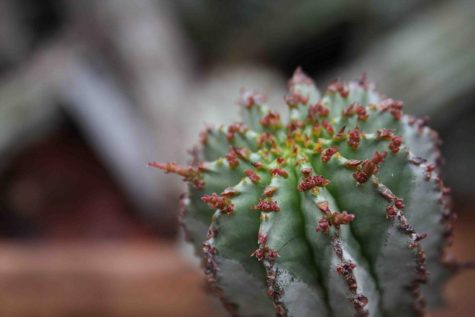
A cactus in the Linnean House. Notice how I obscured the backgound, as it looks very unnatural and unappealing otherwise.
One of the notable plants held in the Linnean House are Camellias, a type of flowering shrub, including endangered varieties. They are in bloom from December to April.
If you have time on your way out, you could stop in the gift shop, because they actually have a decent sized selection of plants for sale in there you can photograph. Keep in mind that it may be a bit difficult given you’re dealing with indoor lighting, but there are actually some interesting plants for sale there.
The Missouri Botanical Garden is a beautiful park with a photography opportunity in every square inch. If you have time and money on your hands, I highly recommend you check it out.
Tower Grove Park features open natural spaces, wide array of interesting subjects
Although it doesn’t display any exotic animals or acres of beautifully designed plant exhibits, Tower Grove park, a large park located around the Missouri Botanical Garden, is still an amazing place–not only to photograph, but to visit as well.
The park is very large, and every part of it is filled with something that could make a great photograph. There is tons of open, natural space with plenty of scenery elements just waiting to be part of a photo. There are also plenty of man-made aspects of the park. It features many colorful, beautifully and distinctively designed pavilions. Among them are multiple “candy cane” pavilions- ones with large, striking roofs painted with red and white stripes. There is also one by the pond influenced by oriental architecture, known as the “Lily Pond Shelter”, and it composes a beautiful scene blended with the waterside. I recommend taking landscape-style shots where you integrate the structures into the environment. You can also get some artsy, abstract shots with more closeup photos using unusual angles and showing the patterns in the architecture.
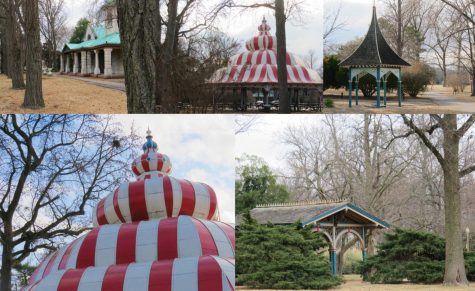
Photos of various structures at the park.
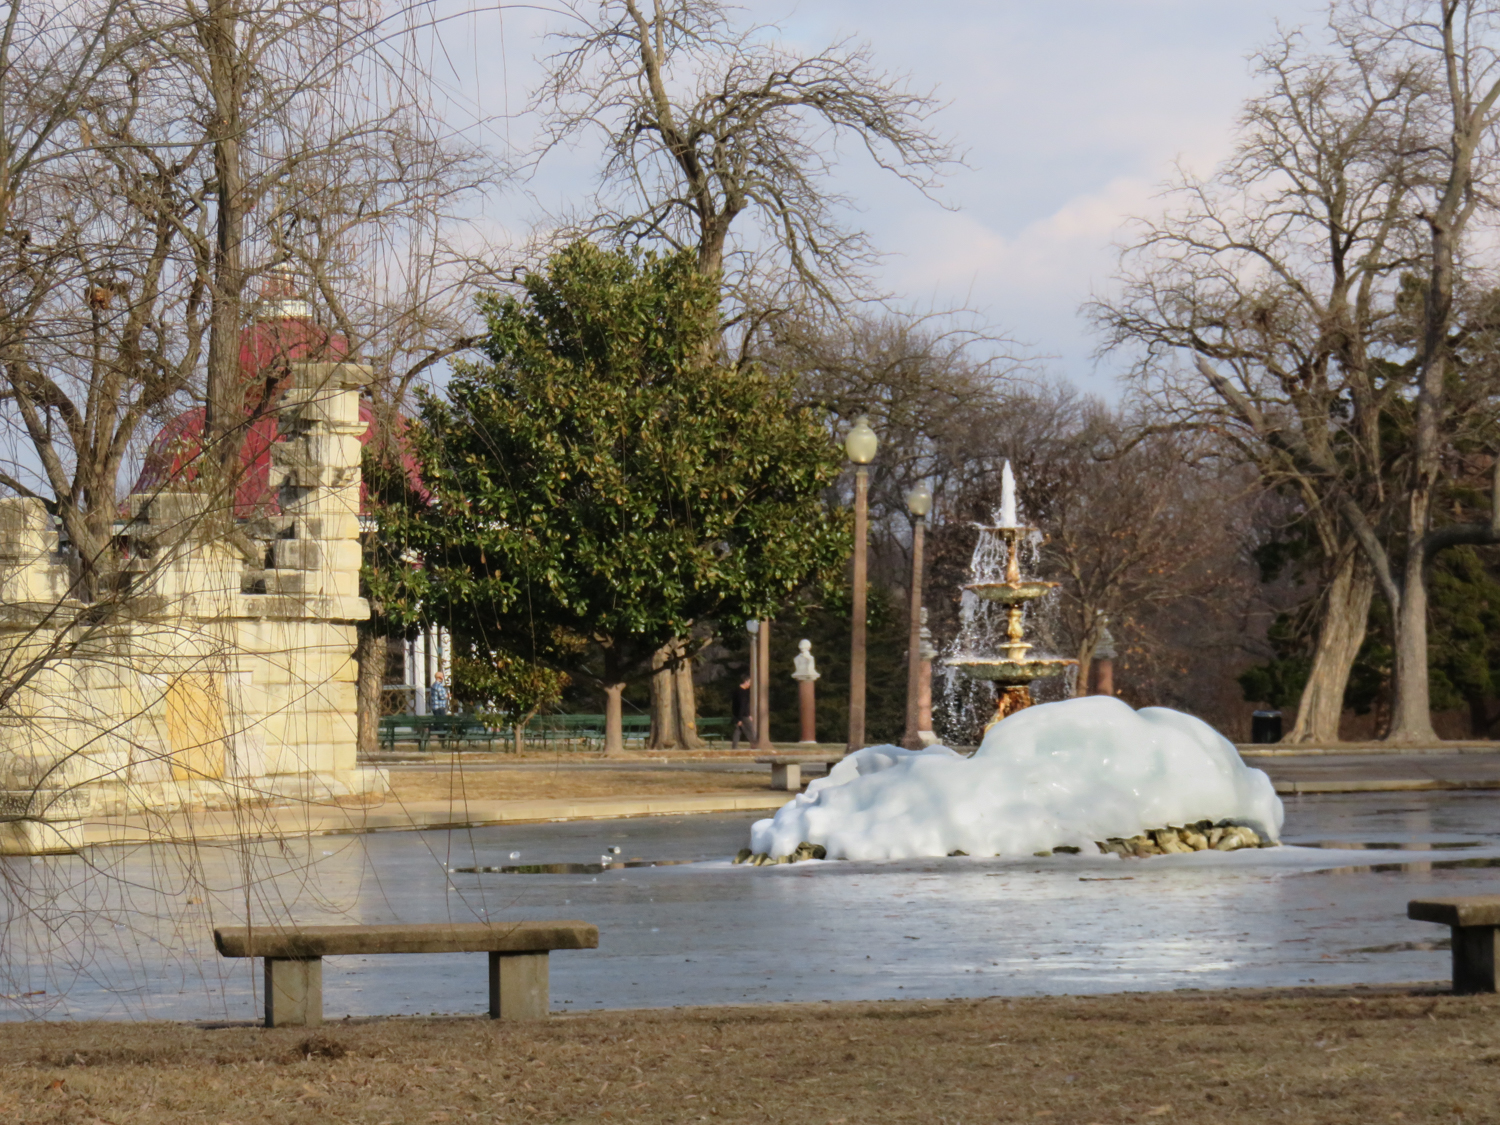
My personal favorite part of this park is a structure called “ruins”. Like the name suggests, it looks like ancient ruins. It features a broken wall around a large pond centered by a fountain, and you get in through a broken opening, which makes for an excellent framing device. There are so many opportunities here. It is a great place for reflection shots. When I came to photograph this park, it was in the winter, and although it was a nice day, the pond was still frozen over and created all sorts of structures in the pond. I’m sure that other seasons would make for their own set of great opportunities.
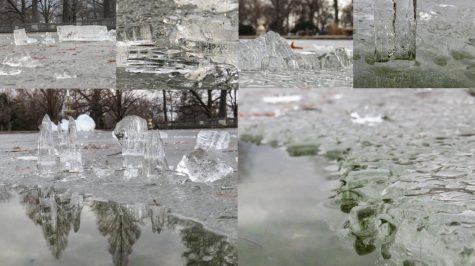
The ice formations at the ruins. Notice the use of reflection on the bottom left photo and the use of texture in all of the photos.
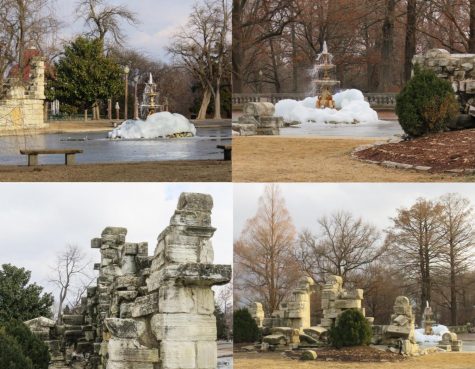
Photos of “Ruins”. This site is great for scenery shots. Several background objects have been removed from the photos.
Two spots that showcase natural beauty here are the tiny creek behind the Pool Pavilion and the water lily ponds. The former has many spots where its banks are spotted by stumpy cypress roots. If you crouch down low, you can take some beautiful, almost surreal looking photos. There are several other parts of the park with cypress trees, but this spot is by far the most picturesque. The latter is, as well as making for great scenery shots, full of beautiful water plants, even in the winter. The can both add to the scenery and make for great close up shots. They tend to be unique, and it is easy to spot patterns that can be used artistically. It also attracts some small animals you’d expect to see in wetlands. Geese are the most prominent example of this. When photographing small animals, I recommend crouching down and getting on their level. It makes for a much more interesting and dramatic perspective. This is also a technique that can be applied to plants, like the cypress roots in the creek.
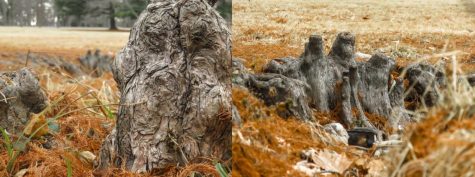
These photos of cypress roots are appealing because the subject’s surreal appearance. The colors have been shifted from the original photos.
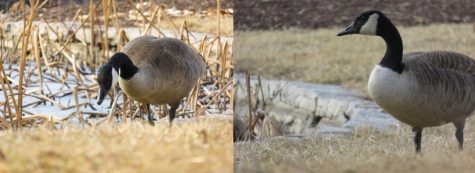
Photos of the geese by the pond. Notice the use of the lower perspective and how it adds to the images.
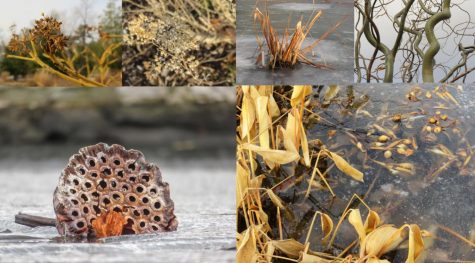
A few of the water plants at the lily pond.
Any outdoor photography site would be bound to be influenced by the weather and seasons, but this is especially true when it comes to Tower Grove Park. Pretty much any given spot in the park will depend strongly on the season. Keeping this in mind when you go will help you get a better idea of the kinds of photos you want to take and what specific subjects you’ll want to focus on. Think about how you can incorporate the season-specific things into your photos.
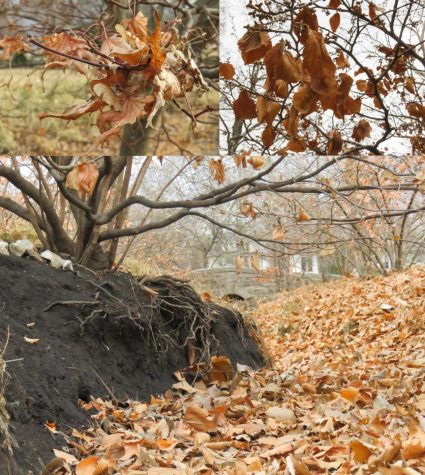
These photos of dead leaves demonstrate the importance of seasons at this park.
One downside of photographing here is that it is a popular hangout spot. This makes it difficult to keep people and cars out of your shots. It is hard to avoid, and there’s not a lot you can do to fix it. In some cases you can use perspective and angle to keep them out of view, but even then, it makes it hard to take the photo you want to take. In many cases, the best tool you have at your disposal will be Photoshop. This is a huge drawback to an otherwise amazing photography site.
However, there are good things that come out of its popularity. People often bring their dogs to this park, and many park visitors would be happy to let you photograph them. Sometimes they will even pay you for the photos, so not only could you have fun taking photos, you might even make a little bit of money.

A dog by the lily pond. The owners were very enthusiastic about my interest in photographing her. They gave me explicit permission to use the photo in this review.
The park also has a farmer’s market in the Spring and Summer. Although that may not sound exciting at first, it is actually a huge market with a variety of food items to buy, not just produce. It is very fun to browse through the different booths. I’ve never brought my camera there, but I imagine there would be some opportunities here for photography, and if not, at least there’s great food.
Overall I highly recommend this park. It proves to have just as many great photo opportunities as the Botanical Gardens and the zoo, but its openness actually gives it an advantage by offering more creative freedom. With only one significant drawback, it is definitely worth any photographer’s time.
